Blanch Almonds in 5 Minutes: The Super Simple Home Guide
Have you ever found a recipe that calls for blanched almonds and your first thought was to rush to the store for a pre-packaged bag? You’re not alone! Many home cooks believe blanching almonds is a complicated, time-consuming process best left to the professionals. But what if we told you that learning
how to blanch almonds in five minutes is not only incredibly easy but also significantly more cost-effective and rewarding? Get ready to unlock a culinary secret that will transform your baking, snacking, and even your approach to gluten-free ingredients.
What Exactly Are Blanched Almonds and Why Bother?
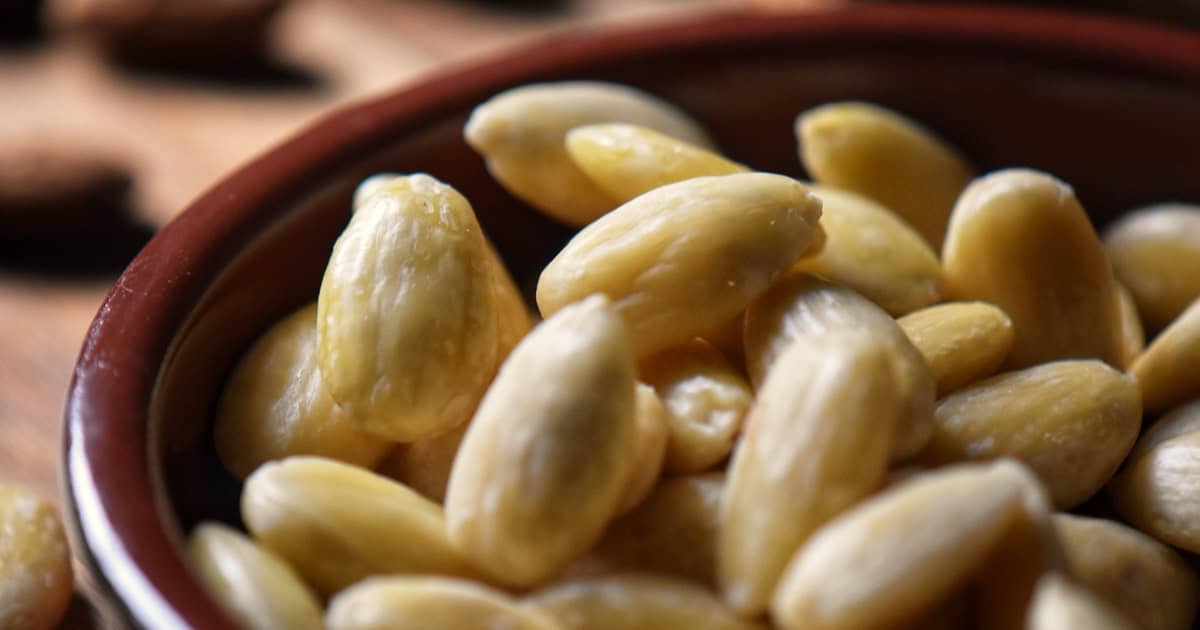
At its core, a blanched almond is simply an almond that has had its thin, brown, somewhat fibrous outer skin removed. This process reveals the smooth, creamy, pale-white nut beneath. While the skin is perfectly edible and nutritious, removing it offers several distinct advantages that are crucial for certain dishes and preferences:
*
Superior Texture and Flavor: The skin of an almond can sometimes impart a slightly bitter or earthy taste and a chewier texture. Removing it results in a milder, sweeter flavor and a smoother, more delicate mouthfeel, essential for pastries like French macarons or fine almond flour.
*
Digestibility: For some individuals, the skin of almonds can be harder to digest. Blanching makes them gentler on the digestive system.
*
Aesthetic Appeal: In many recipes, especially those involving light-colored baked goods or garnishes, the pale appearance of blanched almonds is preferred for a cleaner, more elegant look.
*
Versatility for Flour: Perhaps the most significant reason for many is the ability to create homemade almond flour. True almond flour, unlike almond meal, is made exclusively from blanched almonds. This ensures a finer, lighter texture for baking.
*
Cost-Effectiveness: Pre-blanched almonds can be surprisingly expensive in stores. By purchasing raw almonds and blanching them yourself, you can save a significant amount of money, especially if you use them frequently.
*
Freshness You Can Trust: When you blanch almonds at home, you know exactly how fresh they are. This control over freshness can translate to better flavor in your finished dishes.
For more detailed insights on the economic advantages and ease of this home method, check out our guide on
Unlock Fresh Blanched Almonds: Easy & Cost-Efficient DIY.
Debunking the Myth: Blanching Almonds at Home is Super Simple!
When many people think about removing almond skins, they envision a tedious, impossible task. After all, almond skins aren't loose like those of peanuts or chickpeas. It's easy to assume it requires special equipment or a time-consuming soak. This couldn't be further from the truth! The reality is, blanching almonds at home is one of the quickest, most straightforward kitchen hacks you'll ever learn. It’s a process made up of just a few simple steps, and the entire active time is truly under five minutes. Forget store-bought alternatives – once you master this technique, you'll wonder why you ever considered another option.
Your 5-Minute Guide: Step-by-Step Blanching Process
Ready to discover
how to blanch almonds in five minutes? Gather your ingredients and tools, and let's dive into this incredibly simple yet effective method.
What You'll Need:
*
Raw Almonds: It's crucial to use raw, unsalted, and unroasted almonds. Roasted almonds won't blanch properly.
*
Water: For boiling and rinsing.
*
Small Pot: To boil the almonds.
*
Colander or Fine-Mesh Strainer: For draining.
*
Clean Kitchen Towels: For drying and peeling.
The Four Easy Steps:
1.
Bring Water to a Rolling Boil: Fill your small pot about halfway with water and place it on high heat. Bring the water to a vigorous, rolling boil. Ensure there's enough water to completely submerge your almonds.
2.
Add Almonds and Blanch for 1 Minute: Carefully add your raw almonds to the boiling water. Stir them gently to ensure they are all submerged. Let them simmer in the boiling water for precisely 60 seconds. This short burst of heat is just enough to loosen the skins without actually cooking the nuts themselves. Do not over-boil, as this can start to soften the almonds too much.
3.
Drain Hot Water and Rinse with Cold Water: Immediately after one minute, remove the pot from the heat. Carefully pour the almonds and hot water into a colander or strainer to drain. Then, run cold water over the almonds for about 30 seconds to a minute. This stops the cooking process instantly and cools the almonds down, making them easier to handle. You might even notice some skins already starting to loosen or slip off during this rinse!
4.
Remove the Skins: This is the satisfying part! Spread the cooled almonds out onto a clean kitchen towel. Take an almond between your thumb and forefinger and gently pinch or squeeze it. The skin should slip right off. For any stubborn ones, a slight twist or a firmer pinch will do the trick. You can also place another towel over the almonds and gently rub them, which can dislodge several skins at once. Discard the skins.
Once peeled, spread your blanched almonds on a fresh, dry kitchen towel or baking sheet and allow them to air dry completely for several hours or overnight. Ensuring they are thoroughly dry is critical, especially if you plan to store them or grind them into flour.
Tips for Success:
*
Work in Batches: If you're blanching a very large quantity of almonds, it's better to do it in smaller batches so as not to overcrowd the pot and lower the water temperature too much.
*
Don't Skip the Cold Rinse: The cold water is crucial for stopping the cooking and making the nuts easier to handle and peel.
*
Storage: Store thoroughly dried blanched almonds in an airtight container in the refrigerator for a few weeks, or in the freezer for up to six months.
Beyond the Peel: Creative Uses for Your Freshly Blanched Almonds
Now that you've mastered
how to blanch almonds in five minutes, a world of culinary possibilities opens up! Your freshly blanched almonds are incredibly versatile.
*
Homemade Almond Flour: This is perhaps the most popular use. To make your own almond flour, ensure your blanched almonds are completely dry. Then, place them in a food processor and pulse in short bursts until a fine, powdery flour forms. Be careful not to over-process, or you'll end up with almond butter! Homemade almond flour is naturally gluten-free, paleo, keto, Whole30 compliant, and packed with protein, fiber, healthy fats, vitamins (like Vitamin E), minerals (magnesium, calcium), and antioxidants. It's an indispensable ingredient for delicate French macarons, fluffy cakes, tender cookies, crisp tarts, and even gluten-free breadings.
*
Snacking: Enjoy them as a healthy snack, plain or lightly toasted for an enhanced nutty flavor. You can also season them with a sprinkle of sea salt, cinnamon, or even a touch of chili powder for an exciting twist.
*
Baking and Desserts: Use them whole, sliced, or chopped in various baked goods. They're perfect for adding crunch to muffins, bread, granola, or as a beautiful garnish on tarts and cakes.
*
Savory Dishes: Blanched almonds can also elevate savory dishes. Toast and chop them to add texture to salads, stir-fries, or as a crunchy topping for fish or chicken. They are also a key ingredient in many traditional dishes like almond-crusted fish or certain pilafs.
*
Almond Milk & Butter: While raw almonds are generally used for homemade almond milk and butter, blanched almonds can also be used for a smoother, milder-tasting product, free from any skin particles.
Whether you're making flour or simply want perfect nuts for your next culinary adventure, our article on
Minute Almond Blanching: Perfect for Baking & Flour offers even more fantastic ideas.
Conclusion
There you have it! The once-daunting task of blanching almonds is now revealed as a quick, easy, and incredibly rewarding kitchen skill. By learning
how to blanch almonds in five minutes, you've not only unlocked a more cost-effective way to enjoy these nutritious nuts but also gained the ability to create fresher, finer almond flour and elevate countless recipes. So, the next time a recipe calls for blanched almonds, skip the store-bought bag. Grab a pot, some raw almonds, and in mere minutes, you'll have perfectly blanched almonds ready for all your culinary adventures. Happy blanching!